The Make Header Row from Column transformation enables you to transform the contents of a selected column to header rows. This is useful, for example, if you want to save space or enhance readability by removing a column, and instead have the contents of that column display as header rows in the table.
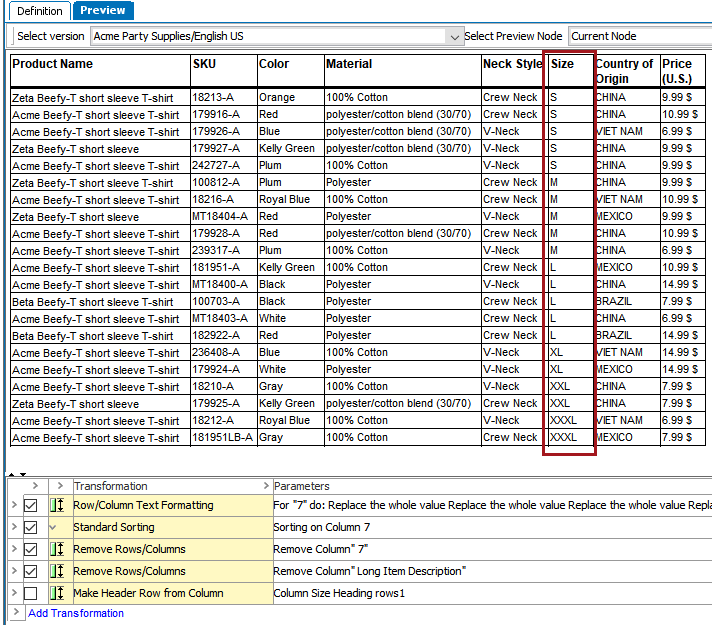
In the following example, the Size column is transformed into header rows.
Before the Make Header Row from Column transformation is applied, the table is sorted on the Size column by S - M - L - XL - XXL - XXXL.
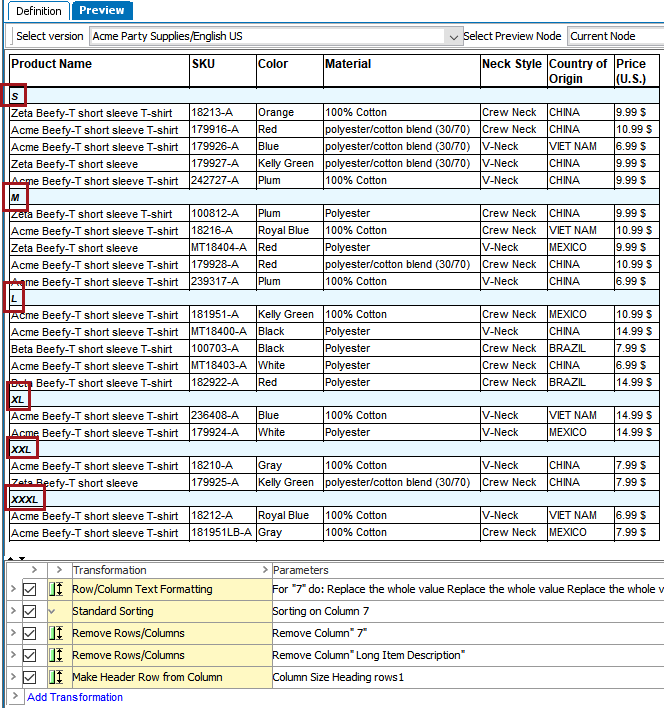
After applying the transformation, the Size column has been removed and header rows have been created based on the contents of the Size column. A new header row is created every time the value changes, for example, from M to L. The rows in this example also have had styling applied within the transformation, including a background shading of light blue and an italic text style.
Adding the Make Header Row from Column Transformation
- With your table open on the Preview tab, click 'Add Transformation' to launch the Select Transformation dialog.
- Expand the 'Transformations' folder and select Make Header Row from Column, then click OK.
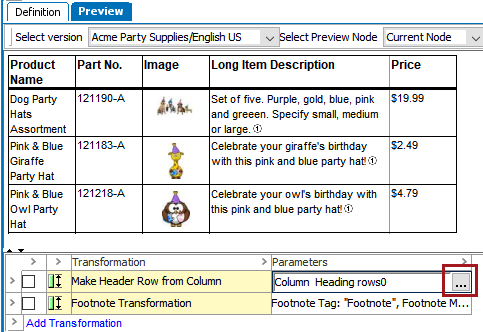
- The transformation is added. Click inside of the Parameters field to display the ellipsis button (
 ).
).
- Click the ellipsis button () to launch the Make Header Row from Column dialog.
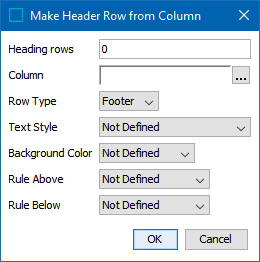
- In the Heading rows field, Enter 1 to ignore 'Heading (1)' rows. Enter 2 to ignore 'Sub Heading (2)' rows. Enter 0 to include all heading rows.
- By the Columns field, click the ellipsis button () to launch the Select Column dialog. This is where you specify which column to convert to header rows.
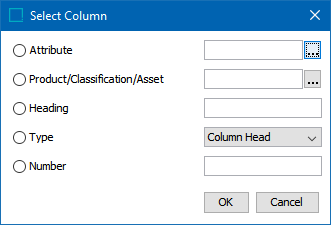
- Select Attribute to apply the transformation to the column that contains the specified attribute. Click the ellipsis button () to search or browse for the relevant attribute.
- Select Product/Classification/Asset to apply the transformation to the column that contains the specified object. Click the ellipsis button () to search or browse for the relevant object.
- Select Heading to identify a column by typing the header text of the relevant column.
- Select Type to identify the column or row by selecting Column Type.
- Select Number to identify the column by entering the sequence number of the relevant column. For example, if you want to apply the transformation the second column, then type 2.
- Click OK to close the dialog.
- In the Row Type list, select the row type that will be used for the converted column.
For the remaining options, leaving them as 'Not Defined' will cause the formatting to be inherited from the specified row type. To override the inherited settings, make a selection.
- In the Text style list, select text style that will be used in the header rows that are created by the transformation.
- In the Background Color list, select the background color you want to use for the header rows that are created by the transformation.
- In the Rule Above list, select the line style you want to use as the top border of the header rows created by the transformation.
- From the Rule Below list, select the line style you want to use as the bottom border of the header rows created by the transformation.
- Click OK.