User privileges can be applied to a STEP Workflow state. When you create a user privilege rule for a node, the group will have that privilege for that particular node and all nodes below it in the hierarchy. When you create a user privilege rule for a STEP Workflow state, the group will have that privilege for nodes in that particular state in the STEP Workflow. A possible use of this is to set up a group of data entry users, that are only allowed to view a part of the product hierarchy. Once the products enters the data entry state, the users can be set up to be able to modify values in a certain attribute group and submit the products once done. Once submitted, they are not be able to search for a product and make any additional changes if the product is not in the data entry state.
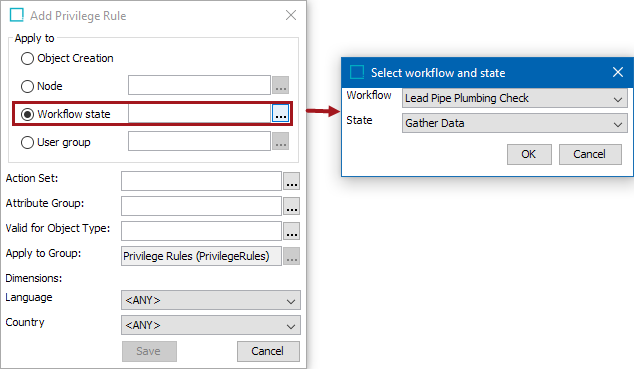
If you click the 'Workflow state' radio button in the dialog below, and click the ellipsis button ( ), you will get the below STEP Workflow state selector:

When applying Workflow state-specific privileges, it is important to keep the following in mind:
-
A user's User Group privilege overrides workflow state-specific rules that restricts the privilege. For example, if the User Group can edit attribute values, a workflow state-specific rule that restricts editing has no impact on users in the group.
-
If state-specific restrictions are not needed, entries are not required either.
-
If state-specific restrictions are needed, a privilege rule must be duplicated for each state.
Workflow State Selector
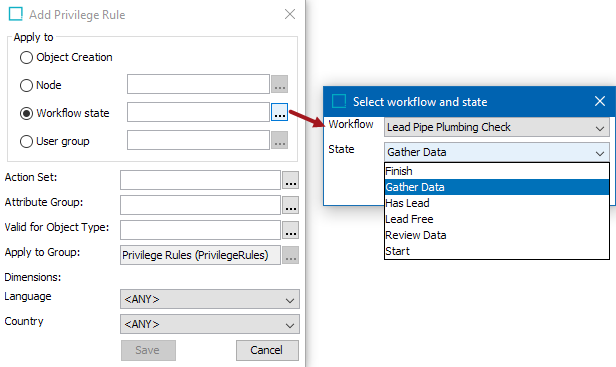
The dialog consist of two combo boxes. The top combo box allows you to select the STEP Workflow. Once the STEP Workflow has been selected the button combo box will be populated with all the states within the selected STEP Workflow. The states are arranged such that cluster and parallel states will have their child states shown below them indented. If you hover the arrow on a state, the hover text will give information about the type of the state; initial, cluster, parallel, or final.

Editing Privilege Rules with Focus on STEP Workflows
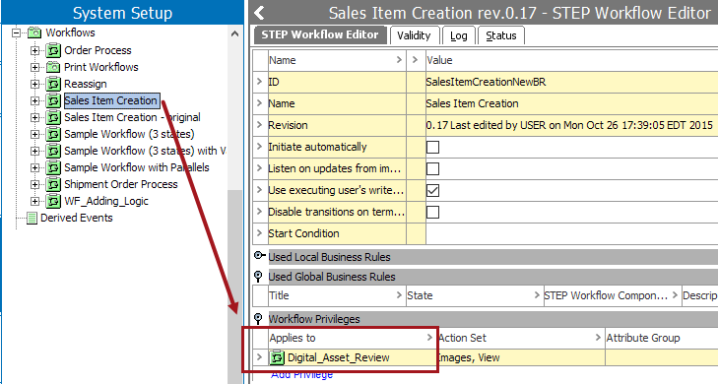
The above describes how to edit privilege rules with focus on a User Group. However, it is also possible to edit privileges with focus on either a product or classification hierarchy. Thus you can also find the privilege table on the 'Referenced By' tab when having selected a product - or on the 'References' tab when having select a classification in the workbench. Additionally, you can set up privileges while focused on STEP Workflows by using the 'Workflow Privileges' table on the STEP Workflow Editor. This shows all the privileges rules referring the selected Workflow. The first column in the table is slightly different from the privilege rules table when shown for a group, where it shows the name of the STEP Workflow followed by the name of the state the rule applies to. On the STEP Workflow Editor the 'Applies to' column only displays the state - as the STEP Workflow is given from the selection.

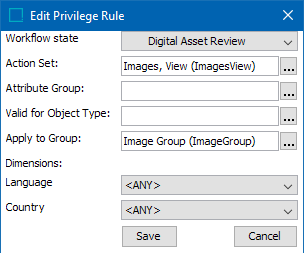
Likewise, when editing a privilege rule or adding a new privilege rule via the STEP Workflow Editor, the dialog is slightly different. Instead of radio buttons to select either a node or a Workflow and State, a combo-box allows you to select a state of the given Workflow.

It is possible to review which states have privilege rules in the Workflow Editor. The states will be marked with an encircled 'P.'
Limitations on Workflow Privileges
Not all actions can be granted as Workflow / State privileges. It is valid for a Workflow / State specific privilege rule to add an action set containing some of the actions that does not apply to Workflow / State specific rules. These actions will be ignored. A list of the valid actions for Workflow / State specific rules are:
-
Approve Classification Product Links
-
Approve Create
-
Approve Data Containers
-
Approve Modify
-
Approve References
-
Approve Values
-
Classify asset
-
Classify product
-
Create asset reference
-
Create classification reference
-
Create collection
-
Create data container
-
Create entity
-
Create entity reference
-
Create product
-
Create product reference
-
Declassify asset
-
Declassify product
-
Delete asset
-
Delete asset reference
-
Delete classification reference
-
Delete data container
-
Delete entity
-
Delete entity reference
-
Delete product
-
Delete product reference
-
Download asset
-
Link (product) attribute into classification
-
Modify metadata for asset
-
Modify metadata for asset reference
-
Modify metadata for attribute to classification link (also translate)
-
Modify metadata for classification
-
Modify metadata for classification reference (link value) (also translate)
-
Modify metadata for data container (property value) (also translate)
-
Modify metadata for entity
-
Modify metadata for entity reference
-
Modify metadata for product
-
Modify metadata for product classification (link value) (also translate)
-
Modify metadata for product reference
-
Modify name/description of asset
-
Modify name/description of classification (also translate)
-
Modify name/description of entity
-
Modify name/description of product
-
Modify product attribute value
-
Move classification from
-
Move classification to
-
Move entity from
-
Move entity to
-
Move product from
-
Move product to
-
View asset
-
View asset reference
-
View attribute to classification link
-
View classification reference
-
View Collection
-
View Collection Group
-
View data container
-
View entity
-
View entity reference
-
View metadata for attribute to classification link (link attribute value)
-
View metadata for asset (property value)
-
View metadata for asset reference
-
View metadata for classification
-
View metadata for classification reference (link attribute value)
-
View metadata for data container (property value)
-
View metadata for entity
-
View metadata for entity reference
-
View metadata for product
-
View metadata for product classification
-
View metadata for product reference
-
View product attribute value
-
View product
-
View product reference
-
Unlink (product) attribute from classification
-
Upload to asset