The Attribute Mapping plugin will copy attribute values from the source object to the target object. It is configured on the Onboarding Mappings Details Screen for the selected Mapper Configuration. The settings available in this plugin allow the user to define what the Mapper Configuration should do with the attribute values.
Note: All settings are not necessary for all attributes. The specific combinations chosen are dependent on the unique requirements for the attribute being configured. The settings contained within this plugin can include transformations. The plugin can be configured to either Onboard / Offboard the data or in some cases can be configured to work along with transformations too.
To configure the Attribute Mapping plugin, follow these steps.
- With the required Mapper Configuration selected, click on New mapping available within the Mappings tab of the Onboarding Mappings Details screen.
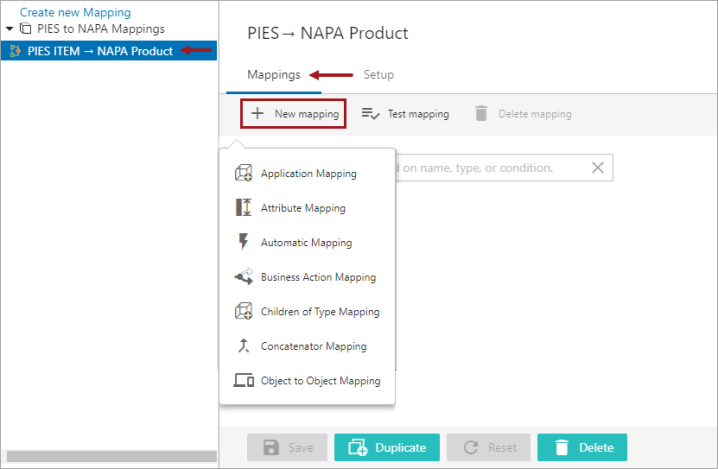
- Select Attribute Mapping, and a screen is displayed prompting the user to further configure the plugin (as shown below).
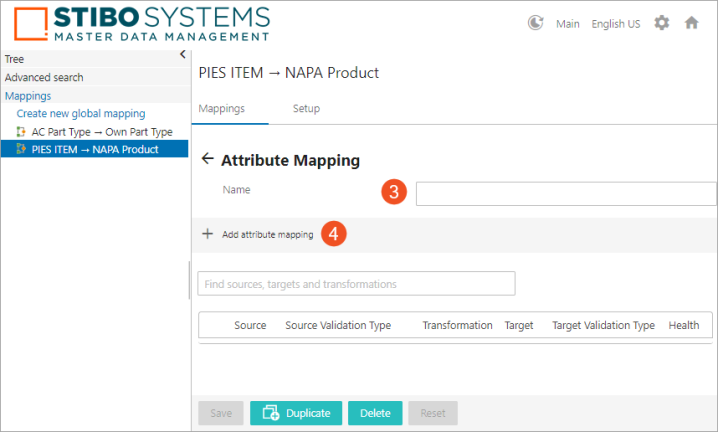
- Type in a suitable name next to Name field. This could be any unique name that clearly describes the mapping functionality.
- Click the ‘Add attribute mapping’ icon, and the Mapping Guide window will display (as shown below).
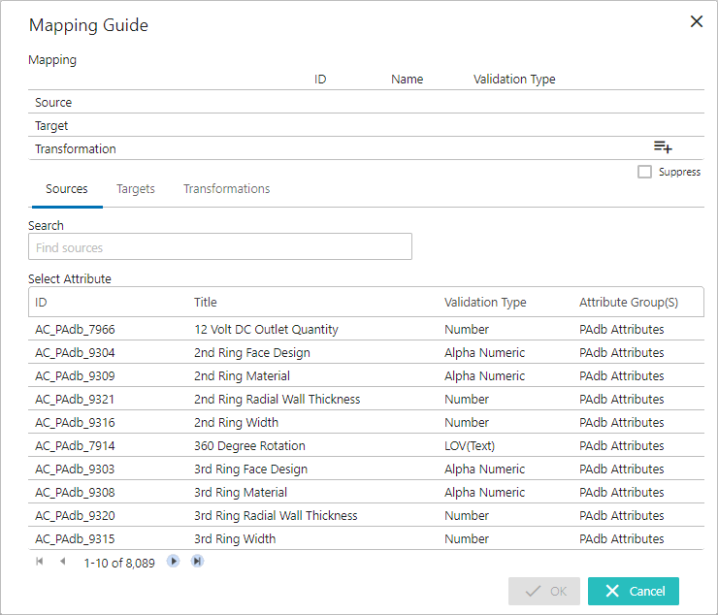
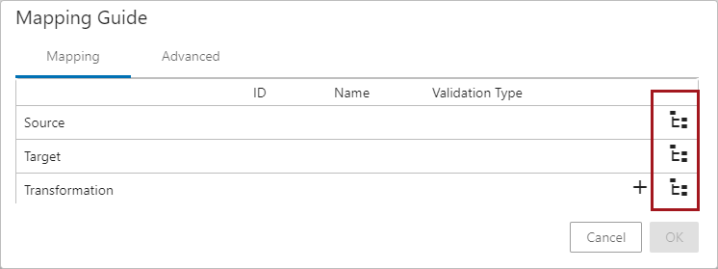
Note: It is possible in the Mapping Guide window to display the regular Node Pickers (as shown below) instead of the typeahead field. In order to use the Node Pickers in the Mapping Guide window, users need to set the following property in the sharedconfig.properties file: Mapper.MappingGuideUseStandardComponents=true.
- With the Sources tab selected, click in the Search field and start typing the initial letters of the attribute name or ID. This brings up a dropdown of typeahead search results listing the attributes of the Source object available in the system from where the attribute value could be retrieved. Select the attribute from the result list displayed below the search bar.
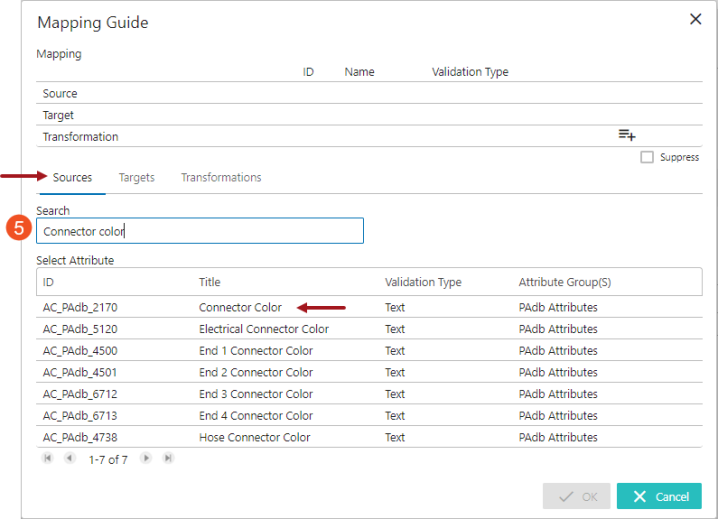
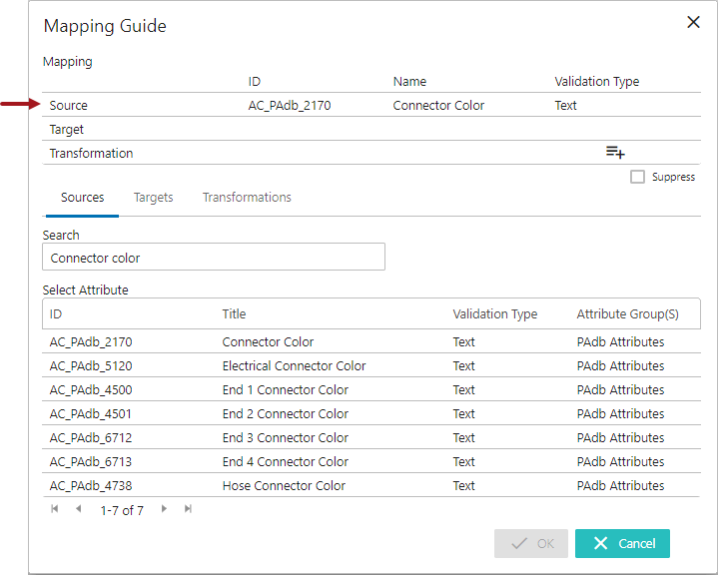
Once selected, the attribute will be populated in the Source field (as shown below)
- With the Targets tab selected, click in the Search field and start typing the initial letters of the attribute name or ID. This searches for the attribute from the Target object where the retrieved value should be copied to. Select the attribute from the result list displayed below the search bar.
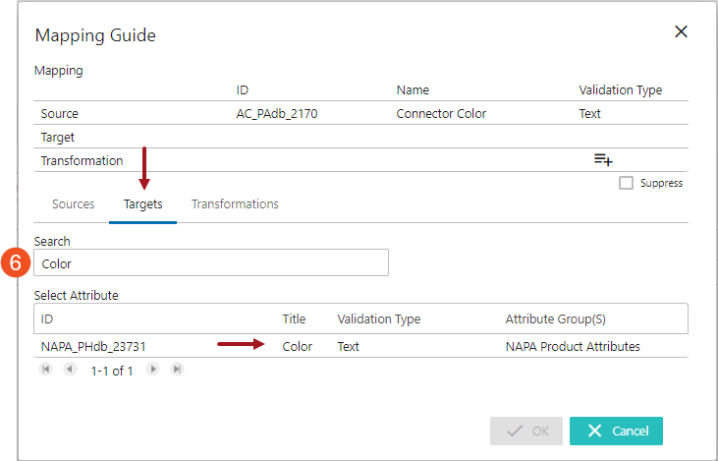
Once selected, the attribute will be populated in the Target field (as shown below).
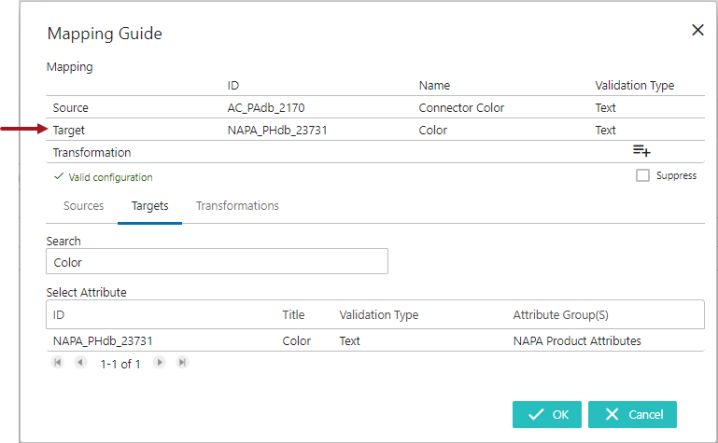
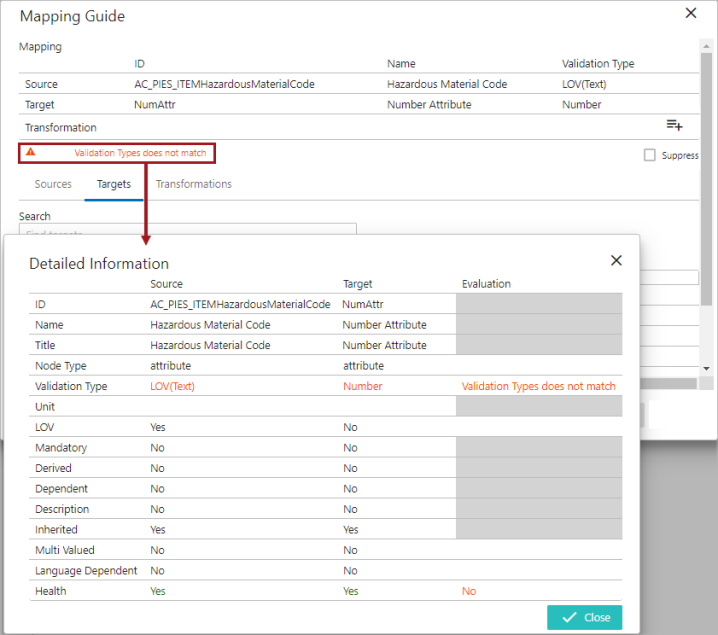
After the source and target attributes are defined, the system evaluates the validity match between the source and the target attributes. A hyperlink text explaining the reason for the validity match / mismatch gets displayed. Clicking on the hyperlink will open the 'Detailed Information' dialog and displays the validity match / mismatch information of the attribute mapping. Below is an example of a validation mismatch between the source and the target attribute displayed in the 'Detailed Information' dialog:
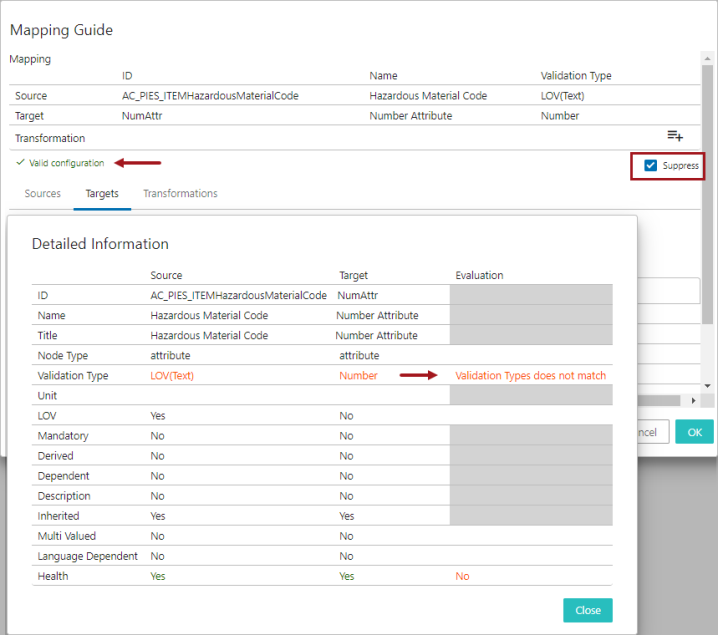
The user can suppress the validation mismatch warning message by clicking on the 'Suppress' checkbox in the Mapping Guide window. Selecting the 'Suppress' checkbox will only remove the data type mismatch warnings displayed on the Mapping Guide window and does not resolve the mismatch irregularities.
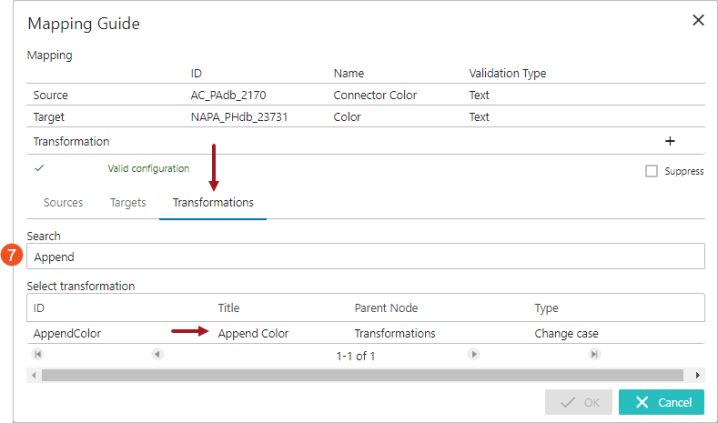
- If transformations are needed, users can either use an existing attribute transformation in the system or create a new one by clicking the 'Create new transformation' icon (
 ) available within the Transformation field. To configure an existing attribute transformation, users should select an existing attribute transformation listed in the 'Transformations' tab displayed in the lower half of the window (as shown below).
Clicking on the 'Create new transformation' icon (![]() ) available within the Transformation field will open the Transformation Overview window where the user can create a new attribute transformation. For details about creating an attribute transformation standing on a Mapping Guide window, refer to Creating Attribute Transformations Through Mapping Guide Window topic within this guide here.
) available within the Transformation field will open the Transformation Overview window where the user can create a new attribute transformation. For details about creating an attribute transformation standing on a Mapping Guide window, refer to Creating Attribute Transformations Through Mapping Guide Window topic within this guide here.
The selected transformation will be populated in the Transformation field (as shown below).
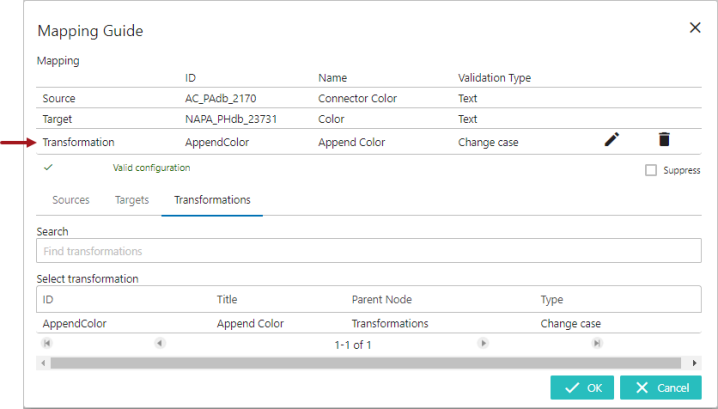
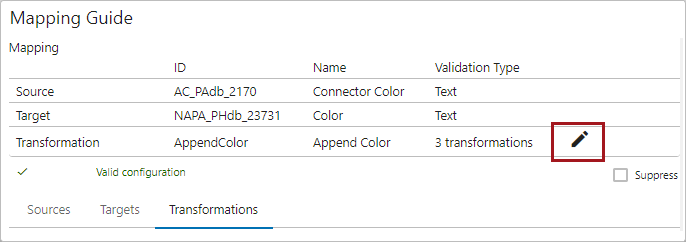
The populated transformation can be edited / removed by clicking the edit icon (![]() ) in the Transformation field.
) in the Transformation field.
Note: Deleting an attribute transformation from the Mapping Guide window means removing it from the current mapping setup; however, editing it impacts all of the other mappings that have used the particular attribute transformation. Users are advised to be cautious before editing the attribute transformation. The Mapping Guide in the Web UI does not analyze if the transformation is applied to any other mapping.
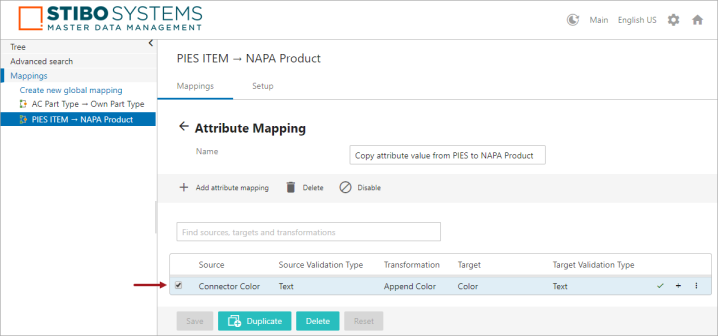
- Click OK to close the Mapping Guide window and then click Save to save the changes. The newly added attribute mapper row will be listed as shown below. To edit the attribute mapping selections, click on the row and it will open up the Mapping Guide window in order to make edits.
- Repeat the above steps 4 to 8 to add more attribute mapping rows for the same plugin.
Important: Users must save the changes before exiting the Mapper Configuration. If the user fails to click Save, then the mapping will be lost once the user leaves the Mapper Configuration.
User can add any number of mapping rows in the mapping plugin. When there are multiple mapper rows available within the mapping plugin, the order of execution of each mapper row is based on the order in which it is listed within the mapping plugin.
The health of the mapper row is displayed next to each mapper row. Users can also add some additional information describing each of the mapper rows. The user has the flexibility to disable, delete, or rearrange the listing order of the mapper rows. For more information on handling the mapper rows, refer to topic Modifying Mapper Rows on the Onboarding Mapping Details Screen within this guide here.