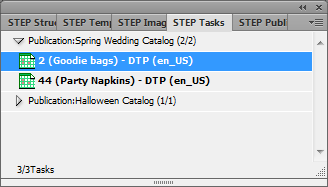
The STEP Tasks panel is used in conjunction with Flatplanner workflows and enables creative staff (DTP operators) to pick up workflow tasks from within InDesign. The panel displays a tree view of tasks similar to what is displayed in the STEP Workflow Tasks tab in the workbench, except the tasks picked up from within InDesign are Flatplanner planned pages. The tasks are grouped by publication.
From the STEP Tasks panel, DTP operators can accept tasks, submit tasks, reject tasks, and more. Tasks typically arrive in the STEP Tasks panel after the page has already been planned in STEP by a merchandiser user, and then released to the DTP operator for further work.
This topic provides a broad overview of the options available on the STEP Tasks panel but does not go into detail on how to use this panel with Flatplanner. Refer to Configuring DTP Task Views for InDesign in the Print Flatplanner documentation
Accessing the STEP Tasks Panel
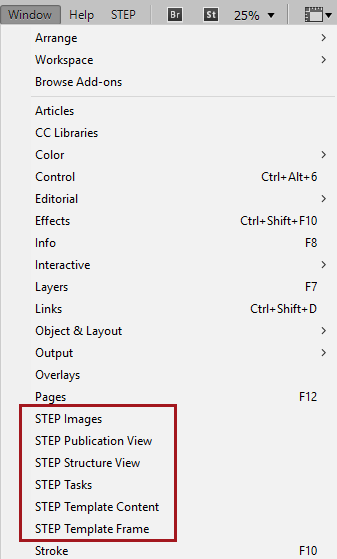
The STEP Tasks panel is accessed by navigating to Window > STEP Structure View from the InDesign application bar across the top of the InDesign interface.
Description of the STEP Tasks Panel
The following screenshot shows the basic objects that display on the STEP Tasks panel. The numbers in the image correspond to the numbered list below it.
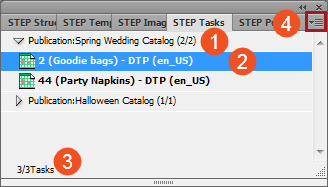
- Publication: Each task (Flatplanner planned page) is organized by publication in the STEP Tasks panel. The numbers in parentheses after the publication name represent the number of unaccepted tasks for the publication / number of available tasks for the entire publication.
- Task: The Flatplanner planned page that is ready to be actioned by the InDesign user, designated by the page number and the page name. If the task is in bold text, the task is new and it has not yet been accepted. If it is in regular text, the task has been accepted. Displayed after the page number and the page name is the name of the current workflow state and the ID of the locale used in the context of your publication version. For example, in the above screenshot, DTP is the workflow state and en_US is the locale ID of an English US dimension point.
- Status: Displays the number of unaccepted tasks for all displayed publications / number of available tasks for all displayed publications.
- Options menu: Sub-menu to display additional functions; described in the next section of this topic.
Options Menu
The Options menu of the STEP Tasks panel contains the following commands.
Note: With the exception of 'Refresh', 'Filter', and 'Show Tasks for Current Publication Only', a task must be selected in order to activate the menu options. (These commands are also available by selecting a task and right-clicking.)
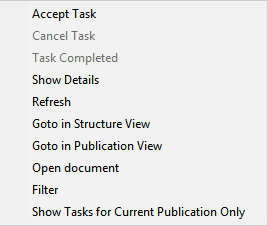
- Accept Task: Launches the 'Accept' Task dialog. To accept the task, click 'Accept'. To cancel and leave the task unaccepted, click 'Cancel'. To open the document in InDesign once the task is accepted, check 'Open document' before clicking 'Accept'. To automatically jump to the planned page in the STEP Publication View panel, check 'Goto in Publication View' before clicking 'Accept'. After accepting a task, the name of the task appears in regular (non-bold) text, and the list of tasks is refreshed.

- Cancel Task: Launches the 'Cancel Task' dialog. This option is only activated when an accepted task is selected. Click 'Cancel Task' to return the accepted task to the list of incomplete tasks. After canceling a task, the name of the task becomes bold again and the list of tasks is refreshed. (Note that the open document is not closed when the task is canceled.)
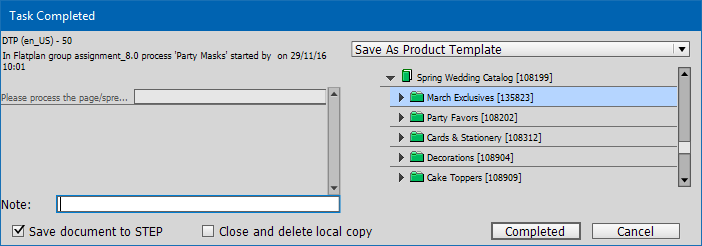
- Task Completed: Launches the 'Task Completed' dialog. (This option is only activated when an accepted task is selected.) Click 'Completed' to complete a task and send a message to the next person in the workflow. After completing a task, the list in the STEP Tasks tab is refreshed, and the task is removed from the list.
To save the finished document back to STEP, check the 'Save document to STEP' box before clicking 'Completed'. (The Section folder where the actual pages should be saved in STEP is highlighted automatically.) To leave a note for the next user in the workflow, leave a comment in the 'Note' field.
To save your document in STEP only, and not save it locally on your computer, check 'Close and delete local copy' before clicking 'Completed'. (Note that the document must first be saved locally before it can be saved to STEP.)
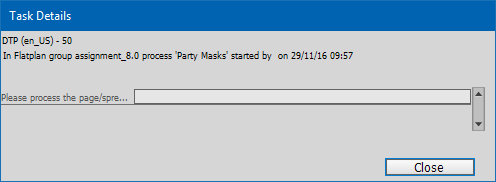
- Show Details: Use this option to display the 'Task Details' dialog, which shows more details about a selected task.
- Refresh: Click to refresh the list of tasks.
- Goto in Structure View: Click to jump to the planned page in the STEP Structure View panel.
- Goto in Publication View: Click to jump to the planned page in the STEP Publication View panel.
- Open document: Click to open the InDesign document that is associated with the selected planned page.
- Filter: Click to filter your task types by workflow state. A 'Choose Item' dialog box appears where you can select the tasks you would like to view.
- Show Tasks for Current Publication Only: Click to hide all tasks that are from publications other than the one that you are currently working with, which is determined by the version that you have selected under STEP > Change Version.