The Automatic Mapping plugin will automatically identify shared attributes and references between the source and target objects and will move the attribute values and references from the source over to the target. The plugin must be added to the Onboarding Mappings Details Screen first in order for it to be selectable within a Mapper Configuration.
Note: All shared attribute values and references will be copied from the source to the target object except for the attribute(s) / reference(s) that is added in the 'Exclude Attributes and References' parameter (as explained below). The settings contained within this plugin cannot include any transformations.
To configure the Automatic Mapping plugin, follow these steps:
-
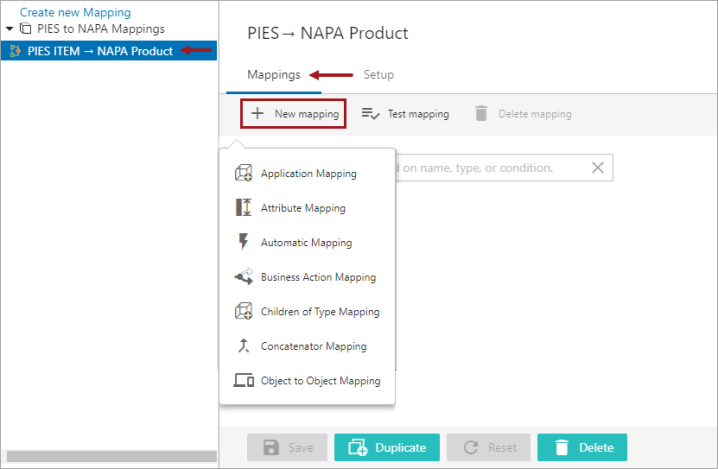
With the required Mapper Configuration selected, click on New mapping that is available within the Mappings tab of the Onboarding Mappings Details screen.
-
Select Automatic Mapping, and a screen is displayed, prompting the user to configure the plugin further (as shown below).
-
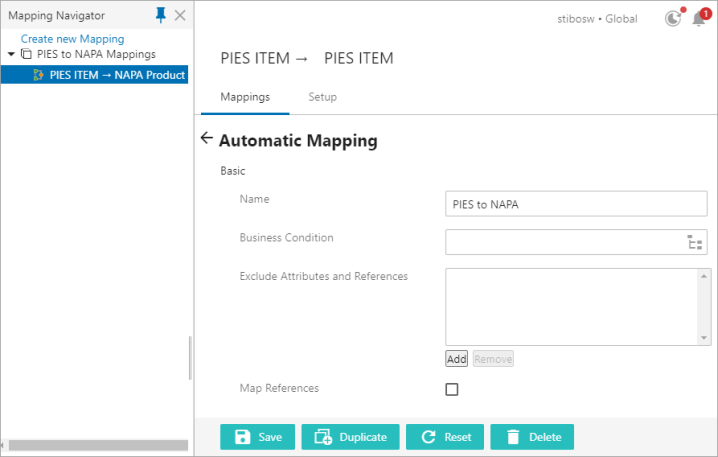
Type in a suitable name next to the Name field. This could be any unique name that clearly describes the mapping functionality.
-
In the optional Business Condition parameter, populate a business condition that determines any condition set to execute the mapping plugin. The mapping plugin will be executed only when the defined condition is met.
-
In the 'Exclude Attributes and References' parameter, click the Add button to open the node picker. Then select the desired attributes and / or references that are to be excluded from being onboarded.
-
Select the 'Map References' parameter only if the source object's references are to be onboarded to the target object. Only the references from the shared reference type will be copied to the target object.
-
Select the 'Ignore Attribute Links on Target' parameter only if the Automatic Mapping plugin should include the orphan attributes for onboarding. Leaving this parameter unselected will exclude the orphan attributes from being onboarded.
-
Click Save to save the changes. The newly added Automatic Mapping will be listed as shown below.
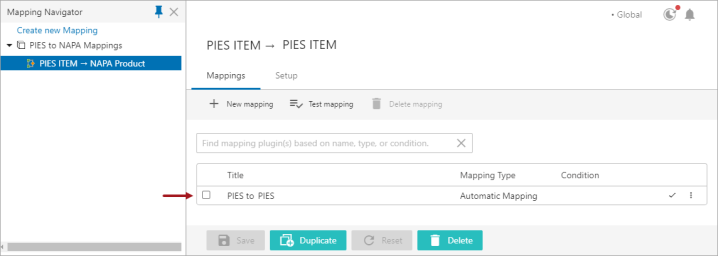
Important: Users must save the changes before exiting the Mapper Configuration. If the user fails to click Save, then the mapping will be lost once the user leaves the Mapper Configuration.
The health of the Automatic Mapping plugin is displayed next to each Mapping plugin. The user has the flexibility to disable, delete, or rearrange the listing order of the Mapping plugins. The checkmark shown in the image above indicates that the mapping plugin is healthy.