Users can create an attribute transformation and define one or more transformations to it through a Mapping Guide window and the Target Hierarchy Editor window. The created attribute transformation will reside in System Setup under the Attribute Transformations node and will be available to be used in all other places where the attribute transformations can be applied on.
This topic explains how to create an attribute transformation through a Mapping Guide window in the Web UI. For information on how to create and configure an attribute transformation through the Target Hierarchy Editor window, refer to the Creating Attribute Transformations Through Mapping Guide Window topic within this guide. For information on how to create and configure an attribute transformation in the workbench, refer to the Attribute Transformations section of the System Setup documentation.
When clicking the Edit icon (![]() ) that is displayed to the right of the Target Hierarchy parameter (available on the Setup tab of the Onboarding Mappings Details Screen), the Target Hierarchy Editor window displays. Clicking on the 'Select and modify transformation' icon (
) that is displayed to the right of the Target Hierarchy parameter (available on the Setup tab of the Onboarding Mappings Details Screen), the Target Hierarchy Editor window displays. Clicking on the 'Select and modify transformation' icon ( ) will open the Transformations dialog. For any Transformation dialog, if no attribute transformation is applied, then a create button (
![]() ) is displayed within the Transformation field. Clicking the create button(
) is displayed within the Transformation field. Clicking the create button(![]() ) will open the Transformation Overview dialog with the parameters explained as follows:
) will open the Transformation Overview dialog with the parameters explained as follows:
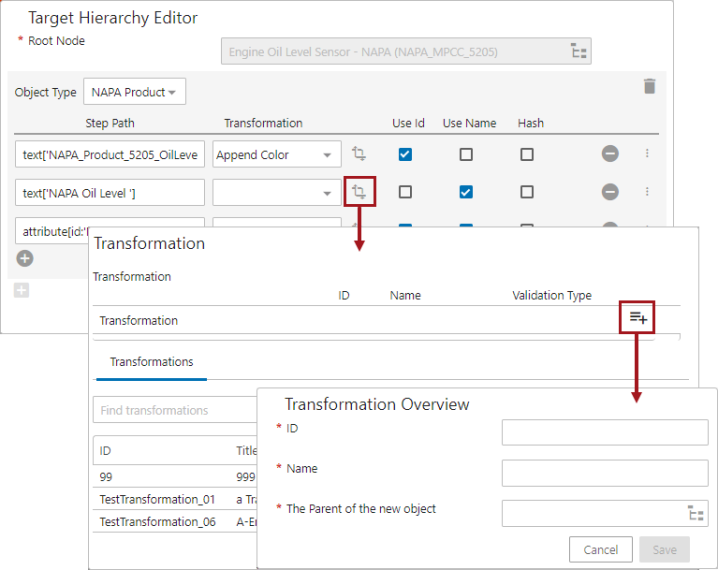
- ID: Type an ID for the attribute transformation.
- Name: Type a suitable name that describes the attribute transformation functionality.
- The Parent of the new object: The user can select the parent node under which the newly created attribute transformation will reside.
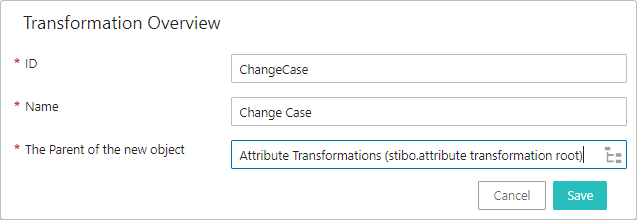
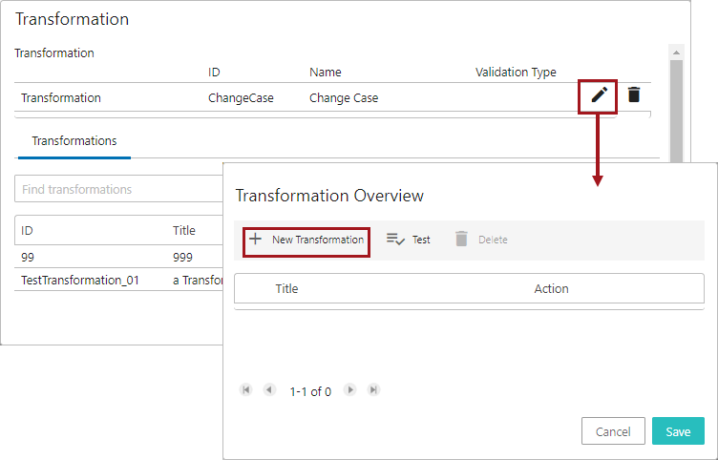
In the example below, an attribute transformation named 'Change Case' (ID=ChangeCase) is created to reside in the Attribute Transformations folder.
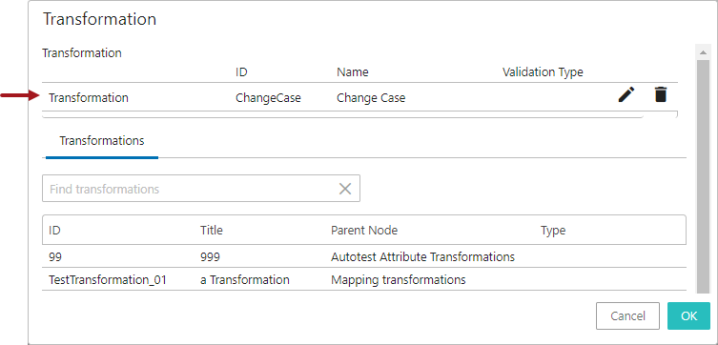
Once all parameters are populated, clicking on the Save button will save and close the Transformation Overview dialog, and the newly created attribute transformation will be populated within the Transformation field of the Transformation window. Should changes need to be made, an edit (![]() ) and a delete (
) and a delete (![]() ) button will be displayed next to the attribute transformation placed in the Transformation field.
) button will be displayed next to the attribute transformation placed in the Transformation field.
The newly created attribute transformation will not have any transformations defined in them. To define one or more transformations, click the edit button (![]() ) to open the Transformation Overview dialog and add a transformation by clicking the New Transformation button (as shown below).
) to open the Transformation Overview dialog and add a transformation by clicking the New Transformation button (as shown below).
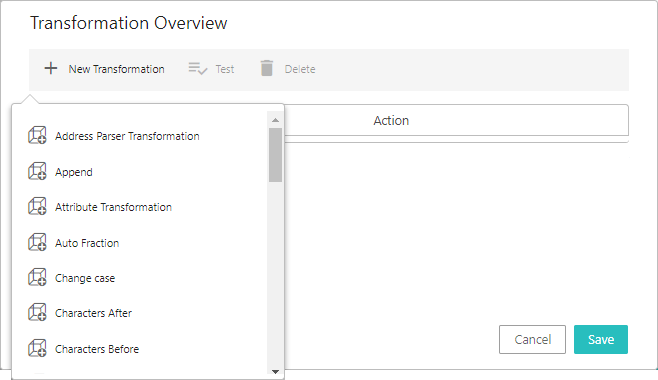
Clicking on New Transformation displays the list of rules to be used. Select the relevant transformation.
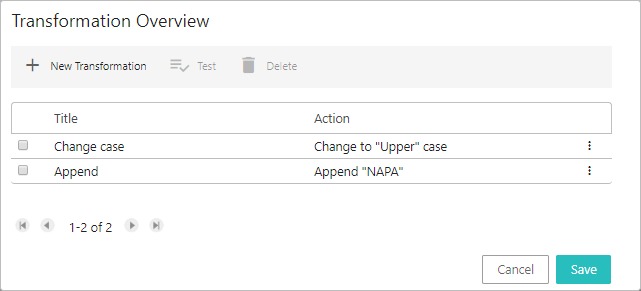
If the selected transformation requires any further configuration, then the Edit Transformation dialog will display. Enter the necessary values and click Save to save and close the Edit Transformation dialog. The selected transformation will get listed in the Transformation Overview dialog (as shown below). For a description of the available transformations, refer to the Transformations topic in the Resource Materials online help documentation.
Note: It is possible to create multiple sequential transformations as a rule, but the user must to be careful about the order in which the transformations are applied.
In the example below, 'Change case' and 'Append' transformations are used.
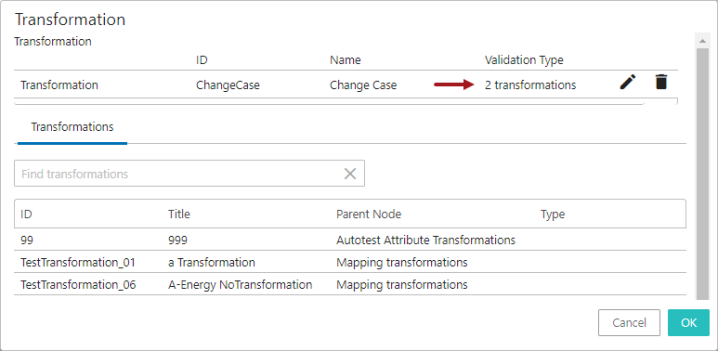
Click Save to save and close the Transformation Overview dialog. The Validation Type column within the Mapping Guide window will display the total number of transformations available in the selected attribute transformation.