To manually set up the Address Component Model, all required object types and attributes must first be created in the workbench. Then, these attributes must be manually mapped to the corresponding Loqate fields in the component model.
Note: This solution can only be used in an on-premises deployment.
Since every screen in the 'Easy setup of Address Component Model' wizard has an option where users can select preexisting object types, attributes, attribute groups, and setup groups, it can be expected that the full configuration of the Address Component Model may be a combination of both easy setup and manual setup. It is also useful to understand how to manually work with the component model since certain one-off operations, like changing an attribute mapping, may need to be performed after the easy setup is complete.
Data Model Considerations and Requirements
To manually set up the Address Component Model in the workbench, some basic data must be in place. Each element that is required to complete the setup is listed below.
- If you plan to use an Address object type (instead of an address data container), it must use an auto-generated ID format (e.g., [id]). An example is shown below.
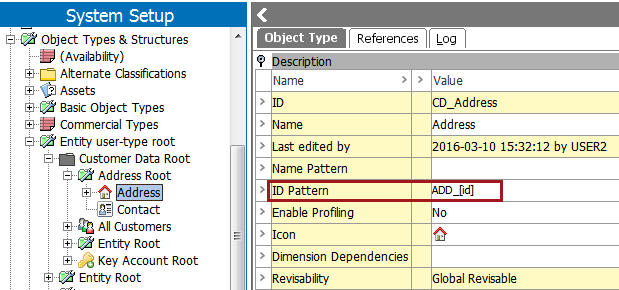
Important: Data container types can also be used and mapped as an Address object type. The attributes mapped to the component model fields must be valid for the specified data container type or types.
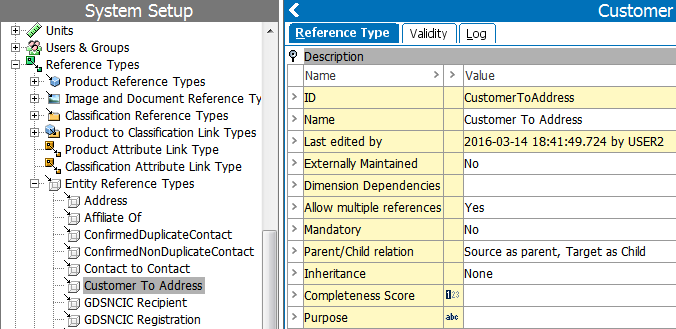
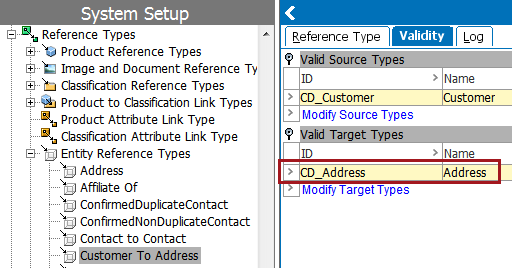
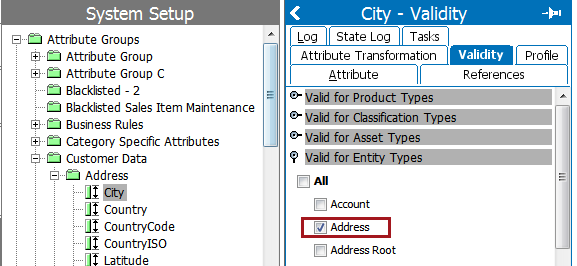
- A reference must exist between the address object type and an associated object type (e.g., supplier, customer, location). The address object must be the target of the reference. An example is shown below.
- Address attributes must exist. The full set of potential attributes to be configured is described within the component model configuration section below. Each attribute must be a Description attribute and must be valid on the address object. The attributes must also be standard text attributes, with the exception of the attribute that will be used for the 'Validation Time' field, which must have a validation base type of 'ISO Date and Time.'
An example of a text-based Description attribute is shown below.

Once the required data model configuration is in place, the component model can be set up.
Manual Attribute Mapping
Each field in the component model has the option to be mapped. Most mappings are self-explanatory, but some tips and guidelines for completing the configuration are noted below.
- The Address mapping must be configured. The selection can be the address object type referred to in step 1 of the data model considerations and requirements, above, or can be any entity or address data container on which the attributes selected in the component model are valid.
- The Input Street, Input Street Name, and Input Street Number parameters are closely related. Input Street is used to hold a complete street address, including a house or building number, as well as a street name. Input Street Name holds the street name only, while Input Street Number holds the building / house number only. These separated fields are especially useful when dealing with standardization and/or deduplication of addresses.
- Any attributes for which address data should be stored must be populated.
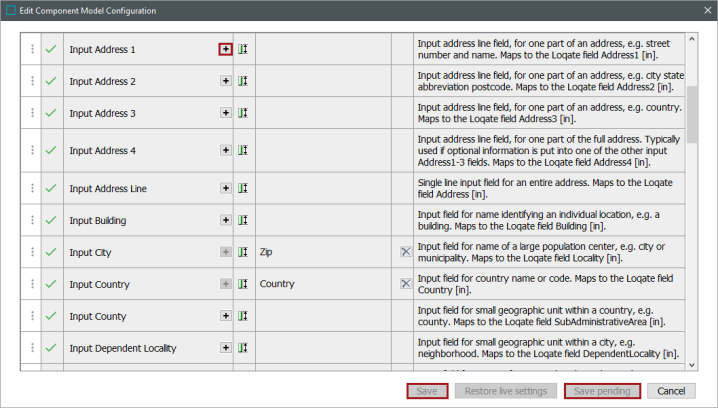
To start the mapping process, click the blue Edit link shown at the bottom of the table.
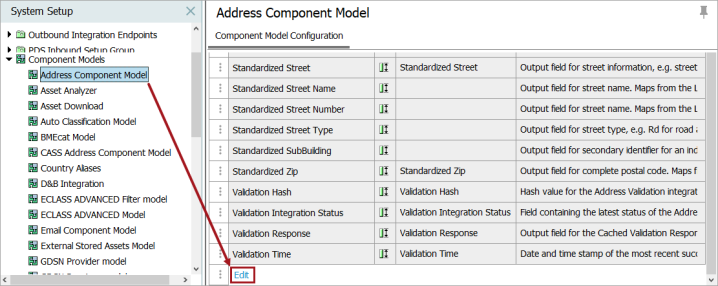
This will open the editor, allowing you to add, edit, and remove mappings.
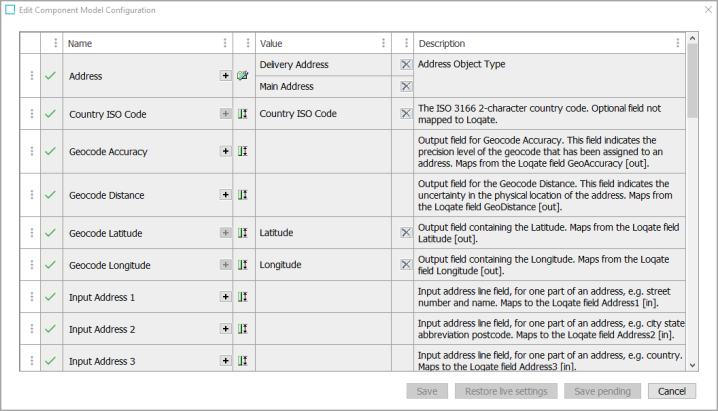
When editing the mappings, double-click the + button to make value additions and the X button to remove any existing values. If the + button is inactive, then the value must be removed before trying to add a new one.
The 'Save pending' button allows you to save the current mappings until all values have been supplied. When clicking 'Save', the component model is functional.