The recommended method for initially configuring the Address Component Model is to use the 'Easy setup of Address Component Model' wizard. By using this wizard, STEP can automatically create all of the address attributes required for the solution while simultaneously mapping them to the corresponding Loqate fields. Additionally, the wizard can create an address data container to house the attributes and a 'standardize address' business action. By using this wizard, little manual action needs to be taken to complete the configuration, making it a simple and straightforward way to get the solution up and running quickly.
The following steps describe how to configure the Address Component Model using the easy setup method. Also note that detailed help text is present on each step of the wizard.
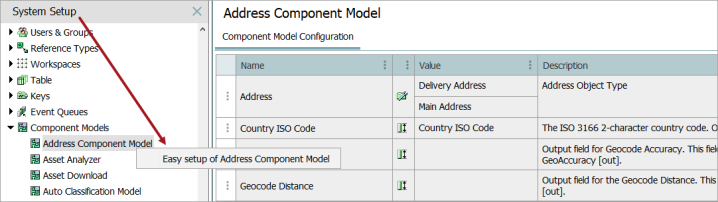
- Locate the Address Component Model under System Setup > Component Models.
- Right-click on the Address Component Model and click 'Easy setup of Address Component Model.'
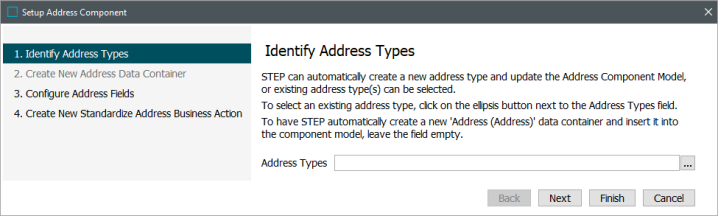
- On the Identify Address Types screen, the system provides the opportunity to automatically create a new address data container object type if one does not already exist.
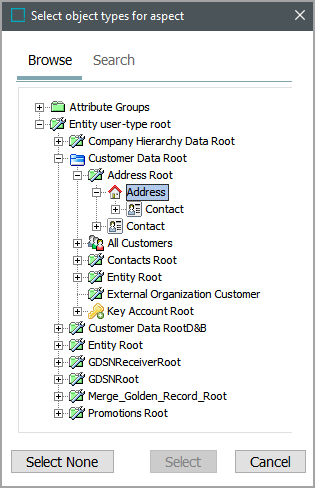
If you already have an object type (or types) that you would like to use, click the ellipsis button ( ) next to the Address Types field and select the relevant object type(s) from the 'Select object types for aspect' dialog. Note that only entities and or data containers can be selected. The below screenshot shows the dialog with a preexisting 'Address' entity object type selected. To multi-select objects, click and hold the Ctrl or Shift key. Click Select to choose the object(s) and close the dialog.
If you prefer to have STEP create the new object type, which will be named Address (ID = Address), leave the 'Address Types' field blank.
Click Next.
Note: If 'Address Types' is left blank in this step, the Create New Address Data Container screen will display after clicking Next (refer to step 4 below). If a previously existing address object type is selected, the Configure Address Fields screen will display (refer to step 5 below).
- If the Create New Address Data Container screen is displayed, in the 'All Object Types' window, select the entity object types that should be valid for the data container that is created in this step. Click the top arrow to move the selections into the 'Selected Object Types' window. To remove an object from the 'Selected Object Types' window, click the bottom arrow to move the selection back to the 'All Object Types' window.
At the bottom of the screen, click the ellipsis button () to select the attribute group where you would like to store the data container. Leave the field blank to have STEP automatically create an attribute group, which will be named 'Address Attribute Group' (ID = AddressAttributeGroup).

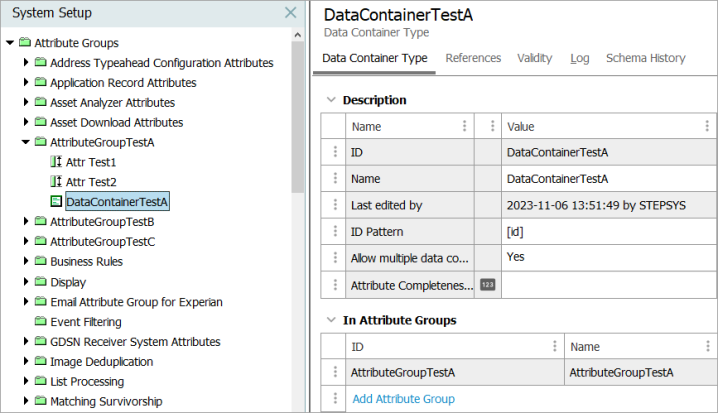
After completing this step, the Address data container will be created and placed into the designated attribute group. The ID pattern will be Address-[id], and 'Yes' will be selected by default for 'Allow multiple data containers.' Any attributes chosen for auto-creation in the next step of the easy setup wizard (Configure Address Fields) will be made valid for this data container.
Note: Any address attributes that exist prior to the easy setup of the Address Component Model will not be modified by the easy setup action. I.e., they will not automatically become valid for the data container created in this step and must be manually linked to it later. For more information, refer to the topic Setting Up Data Container Types in STEP Workbench in the Data Containers section of the System Setup documentation.
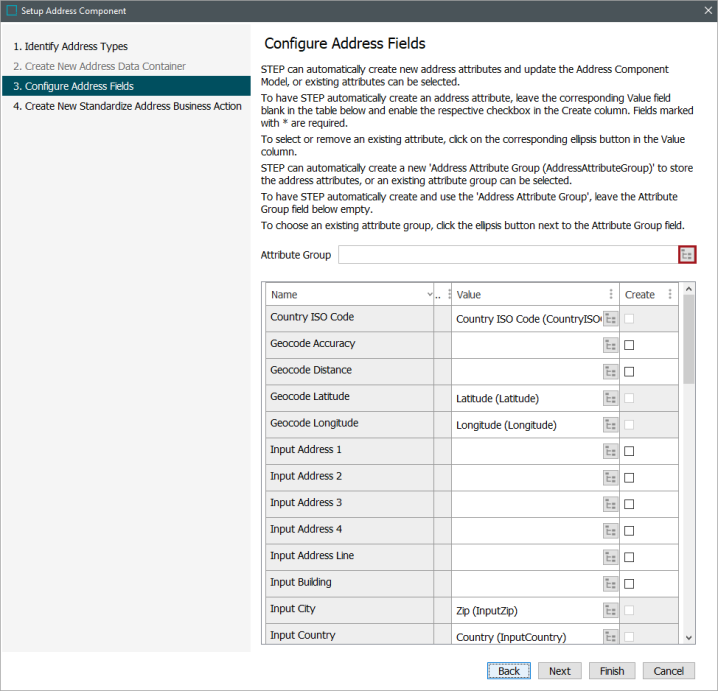
- On the Configure Address Fields screen, attributes are mapped to corresponding Loqate input and output fields. (Some fields are not mapped to Loqate, such as 'Country ISO Code'.) To select or remove the displayed mapping to a STEP attribute, click on the corresponding ellipsis button () in the Value column. For full information on the range of fields available in the component model, refer to the topic Address Component Model.
To have STEP automatically create an address attribute, leave the corresponding Value field blank and enable the respective checkbox in the Create column. All automatically created attributes will be description attributes and be made valid for the configured address types. They will have a name equal to the field name and an ID equal to the field name with spaces removed. For example, for the 'Standardized Double Dependent Locality' field, the automatically created attribute will be named 'Standardized Double Dependent Locality' and have the ID of 'StandardizedDoubleDependentLocality.'
It is not required to have STEP create the attributes, but is recommended. If any of the attributes already exist (based on ID) and the Create box is checked, a message will display to inform the user that the attribute already exists.
Note: No 'select all' option is available for the Create column; this omission is intentional, as it forces users to give more thought as to which attributes they actually need instead of creating all attributes at once and having too many. The complete set of input and output fields cover several address formats, so it is important that users consider select and/or create the attributes that match their business needs. For example, if there is a need for importing single-line addresses, then the 'Input Address Line' field should be activated.
To select an attribute group where you would like to store the newly created attributes, click the selector button ( ) next to the Attribute Group field to launch the 'Select Attribute Group' dialog. Leave the field blank to have STEP automatically create the attribute group, which will be named 'Address Attribute Group' (ID = AddressAttributeGroup).
Click Next when you have finished mapping your attributes.
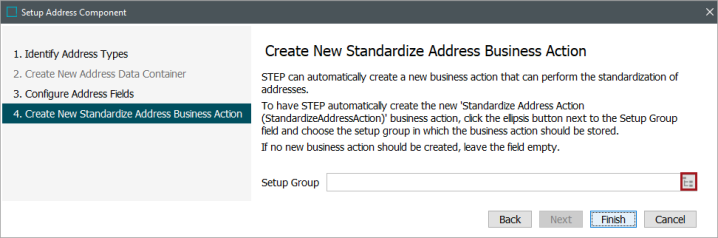
- On the Create New Standardize Address Business Action screen, if you would like to have STEP automatically create a 'Standardize Address' business rule, click the selector button () next to the Setup Group field and select the setup group to house the action. Leave the field blank and click Finish if you do not want to create the business rule or would like to create it at a later time.
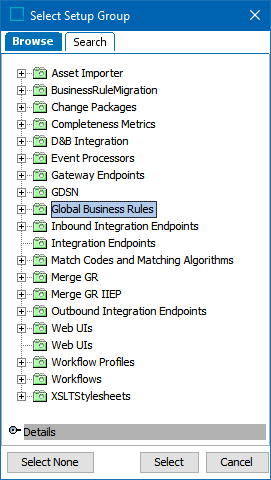
In the 'Select Setup Group' dialog, choose the setup group in which you would like to store the newly created business rule, then click Select to close the dialog.
For more information on how to complete the configuration of this business action after it is created during the easy setup process, refer to the topic Business Action: Standardize Address in the Business Rules documentation.
- Click Finish to complete the wizard and create the business action.