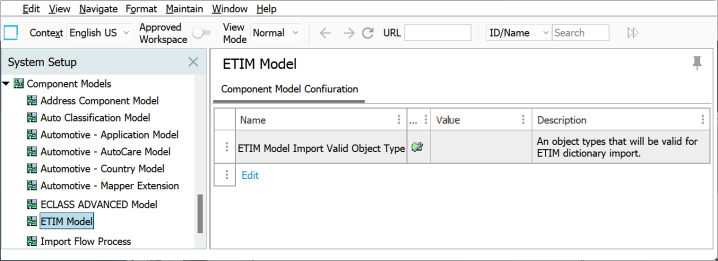
The functioning of the ETIM Taxonomy API Importer requires a data model for setting up the importer. A component model called ETIM Model must be configured to use the ETIM Taxonomy API Importer. When the easy setup actions, outlined in this guide, are completed, many of the configurations for the ETIM Taxonomy API Importer are automatically configured within the ETIM Model that is available within the STEP workbench > System Setup > Component Models.
The easy setup actions are not designed to provide a complete solution but rather give admins a jump start on completing many of the necessary configurations.
Below is a sample of the ETIM Model that is to be configured for setting up the ETIM Taxonomy API Importer.

This section addresses the necessary actions an admin must take to set up the ETIM Taxonomy API Importer solution.
Prerequisites
It is assumed that the admin has knowledge of STEP administrative functions and experience working in System Setup, including creating and editing workflows, business rules, Web UIs, attributes, etc. Therefore, this guide does not provide introductory material for these concepts and instead targets only the specific information needed for a knowledgeable STEP admin to complete the ETIM Taxonomy API Importer solution setup. If additional information is needed, refer to the STEP Online Help.
Configuring the ETIM Model
The following steps describe how to configure ETIM Taxonomy API Importer using the easy setup method.
-
Go to Context and select the relevant context option from the dropdown.
Note: Consider your relevant STEP Context before you trigger the easy setup. Pay attention to the language-dependent data such as attribute names and others. If you perform the easy setup in a second attempt using a different STEP context, the imported data from the first attempt will not be updated. Stibo Systems recommends running the setup from a global context.
-
Go to System Setup > Component Models > ETIM Model.

-
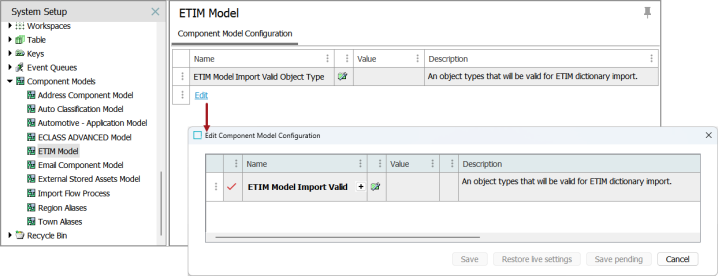
On the right panel, click the blue Edit link shown at the bottom of the table. This will open the editor, allowing you to add object types.

-
Select the object type(s) for which the attributes are to be made valid. To select an object type, double-click the + button to display the Select Object Types dialog (as shown below). It is also possible to select multiple object types.

-
Right-click on the ETIM Model and select Configure ETIM Data Model.

-
When all the required object types are included, click the OK button. A dialog will display stating the changes that will be made by running the process. If you would like to record the changes, you may do so by taking a screenshot of the dialog.

-
When you are ready to start the configuration process, click the OK button. The system will create all necessary elements to support the applicable process. This will typically take less than a minute, and when complete, a dialog will display listing each change that was made.
-
Click the OK button to close the dialog and resume normal activities on the system.
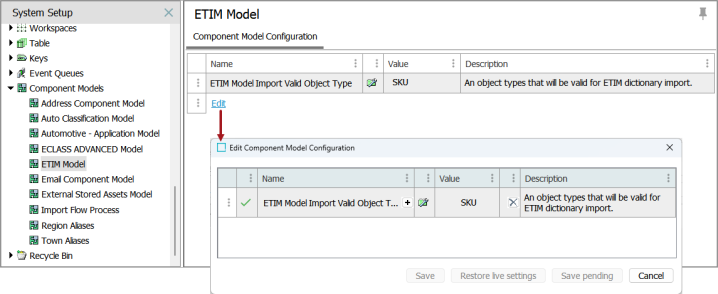
The selected object types that are mapped to the ETIM Component Model will be listed within the Value column of the Component Model Configuration window.

Adding / Removing Object Types from the ETIM Component Model
An alternate way to add object types to the ETIM Model is by accessing the Component Model Configuration window. Follow the steps below to add a new object type or to remove an object type from the component model:
-
Click the blue Edit link shown at the bottom of the table. This will open the editor, allowing you to add, edit, and remove object type mappings.

-
When editing the mappings, double-click the + button to make value additions and the X button to remove any existing values. If the + button is inactive, then the value must be removed before trying to add a new one.
Note: Once an object type is assigned, removing it later from the Component Model Configuration does not affect the validity of existing ETIM attributes. That is, attributes already valid for the object type remain valid. However, future imports from ETIM will use the updated list of valid object types when updating ETIM attributes.