The tabs in a Static Record, Edit, Preview, and History, enable users to craft the enhanced content in the exact way needed for product sale.
Edit Tab
In this tab, users build and design the actual record. Users add the desired modules in the preferred order, filling out fields and selecting images to create a robust offering.
Within the Edit tab, there are two sections to complete for crafting the desired layout: Basic Information and Content Editor.
Basic Information
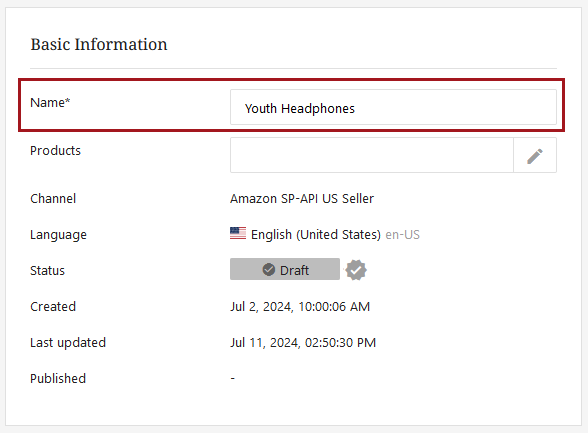
Follow the steps described below to fill out the name for the Static Record and associate it with the desired products:
-
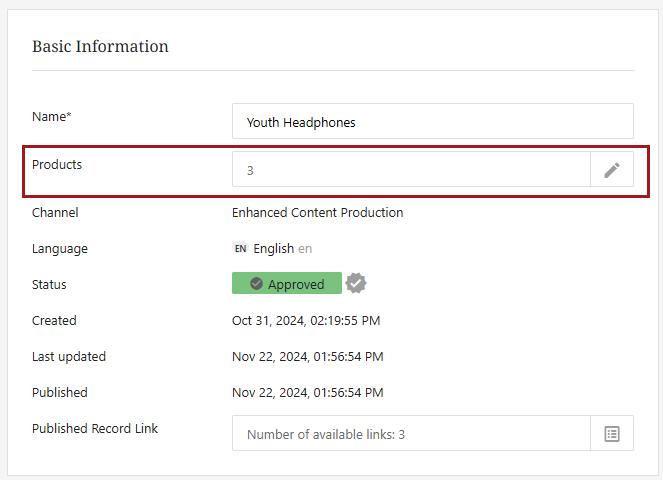
Enter the name in the Name field.
-
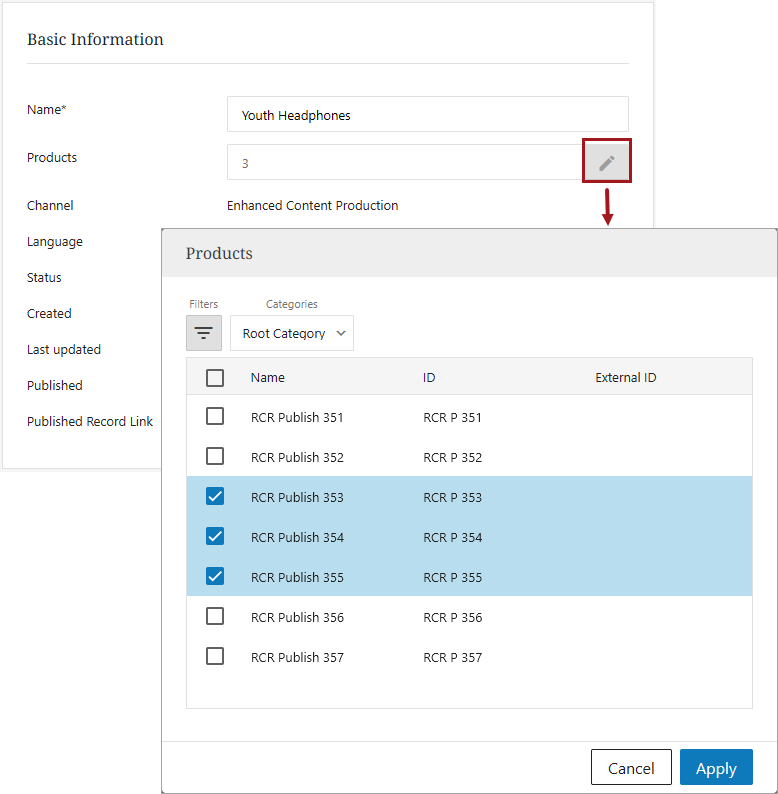
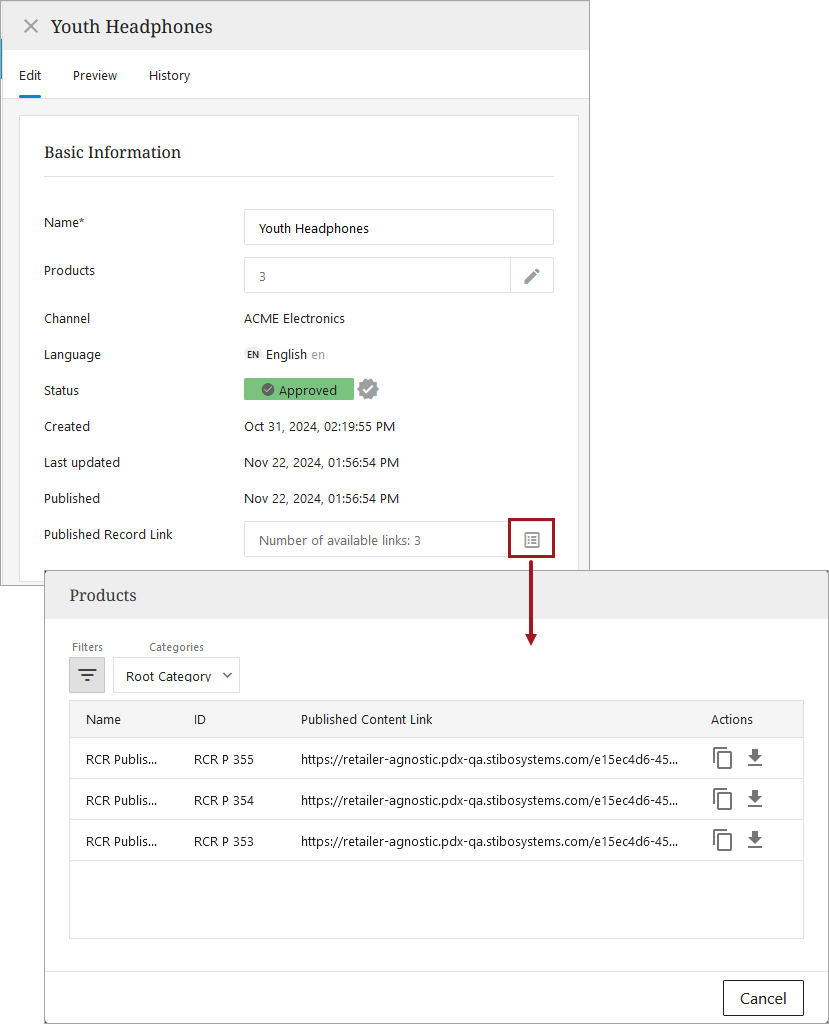
Click on the pencil icon to display the Products dialog.
-
In the Products dialog, a list of products from PDX displays. Select directly from the list or use the filter to find the desired products. Refer to the Filtering topic in this documentation for more information on filter.
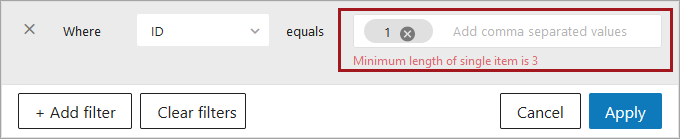
Note: Each applied filter must have a minimum of three characters.
Once the products are selected, a number displays in the Products field, informing the user how many products are associated with the Static Record.
-
The remaining fields are information fields that are pre-populated and read-only. They reflect the status and history of the record.

-
Channel- The channel the Static Record is associated with
-
Language- The language the Static Record is created in
-
Status- The phase the Static Record is currently in and any badges associated with the state
-
Created- The date and time the Static Record was designed and generated
-
Last updated- The date and time the Static Record was last edited and "Saved" or "Saved and Published"
-
Published- The date and time the Static Records was last pushed to the Enhanced Content platform
-
Published Record Link: This field displays and is populated with a sharable URL only for retailer agnostic channel records after a record is Approved and the user clicks the Publish button. This sharable URL enables customers to deliver enhanced content to any retailer. To access all available URL links, click the list icon.
-
Once the record has a name and products are associated with it, continue with the Content Editor, which is where modules are arranged and populated.
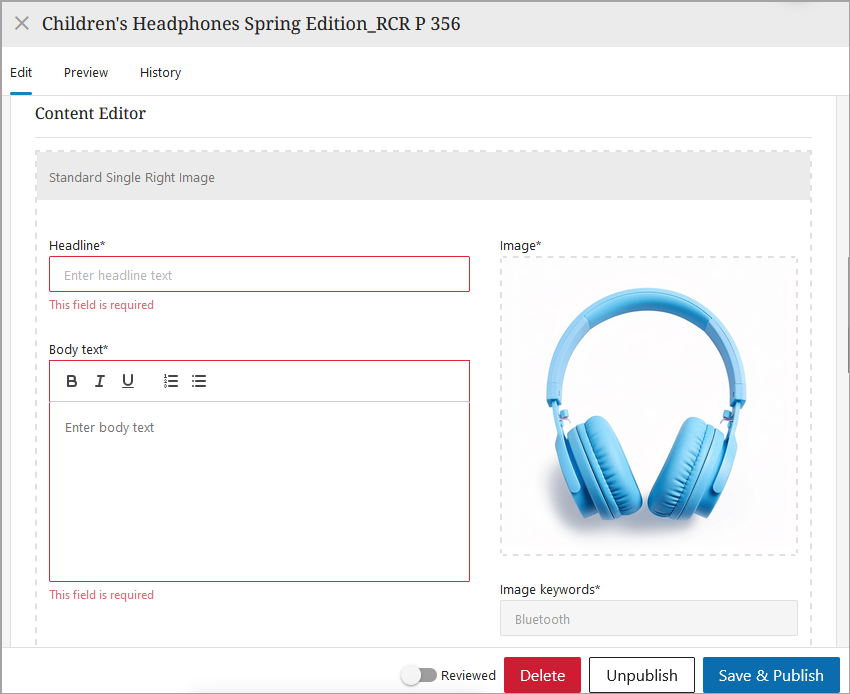
Content Editor
The Content Editor section is where users can add modules to a record and enrich it with content. The instructions below describe how users can add and enrich modules.
-
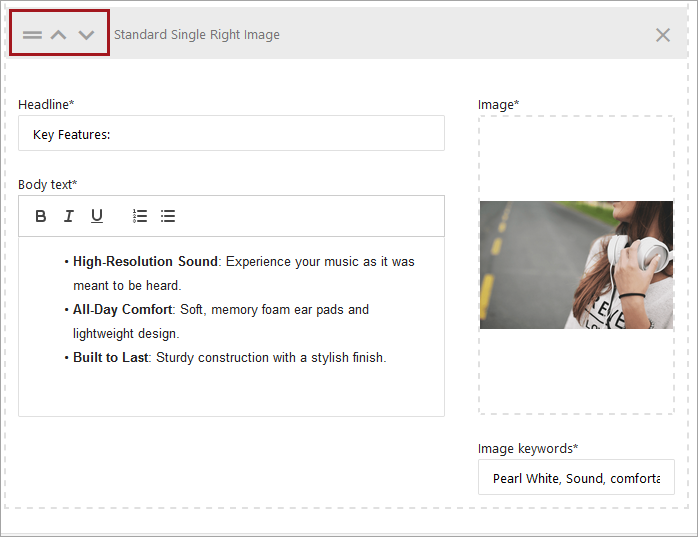
To build the layout for the record, click and drag the desired modules from the Available Modules right-side column into the Content Editor space.
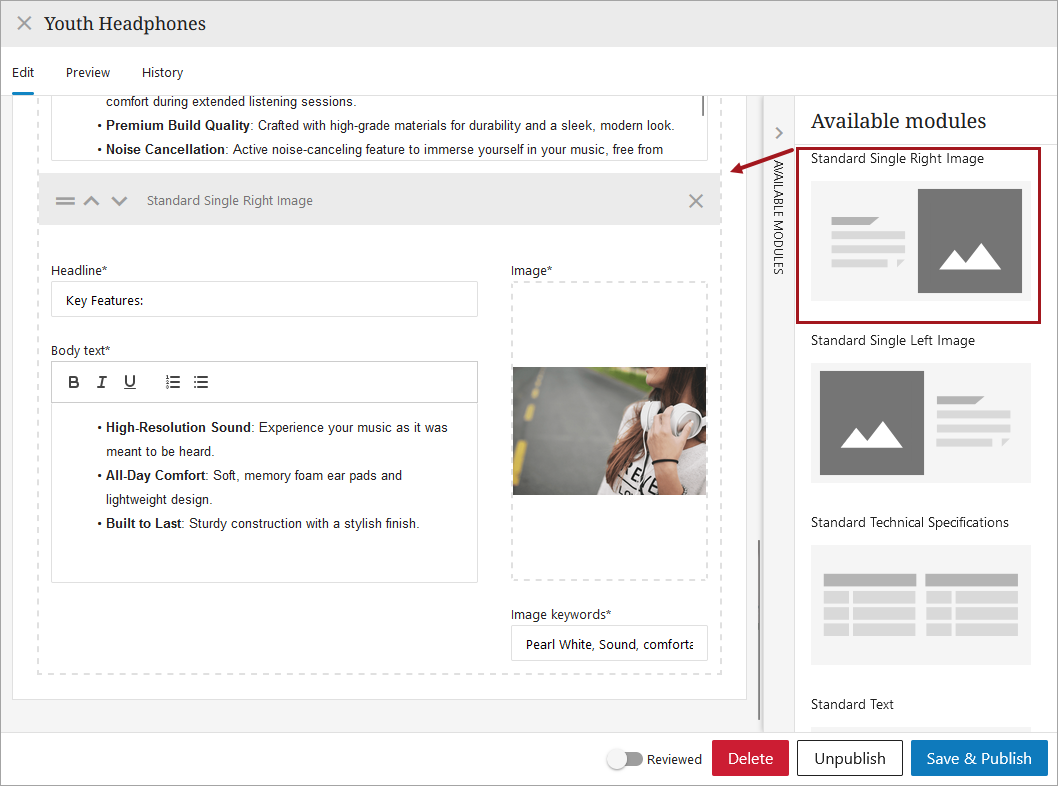
As many as five modules can be added. To change the positions of a module relative to other modules, click the up and down arrows located in the upper left-hand corner of the module, or drag the module via the drag handle located to the left of the arrow buttons.
-
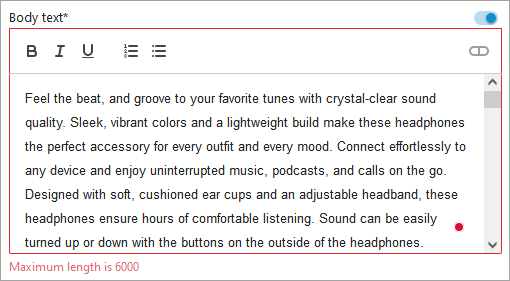
Depending on the module selected, complete the layout design, such as adding: header, images, and text. Any stipulations, such as maximum image size or maximum text, are called out to the user if they are not in compliance.
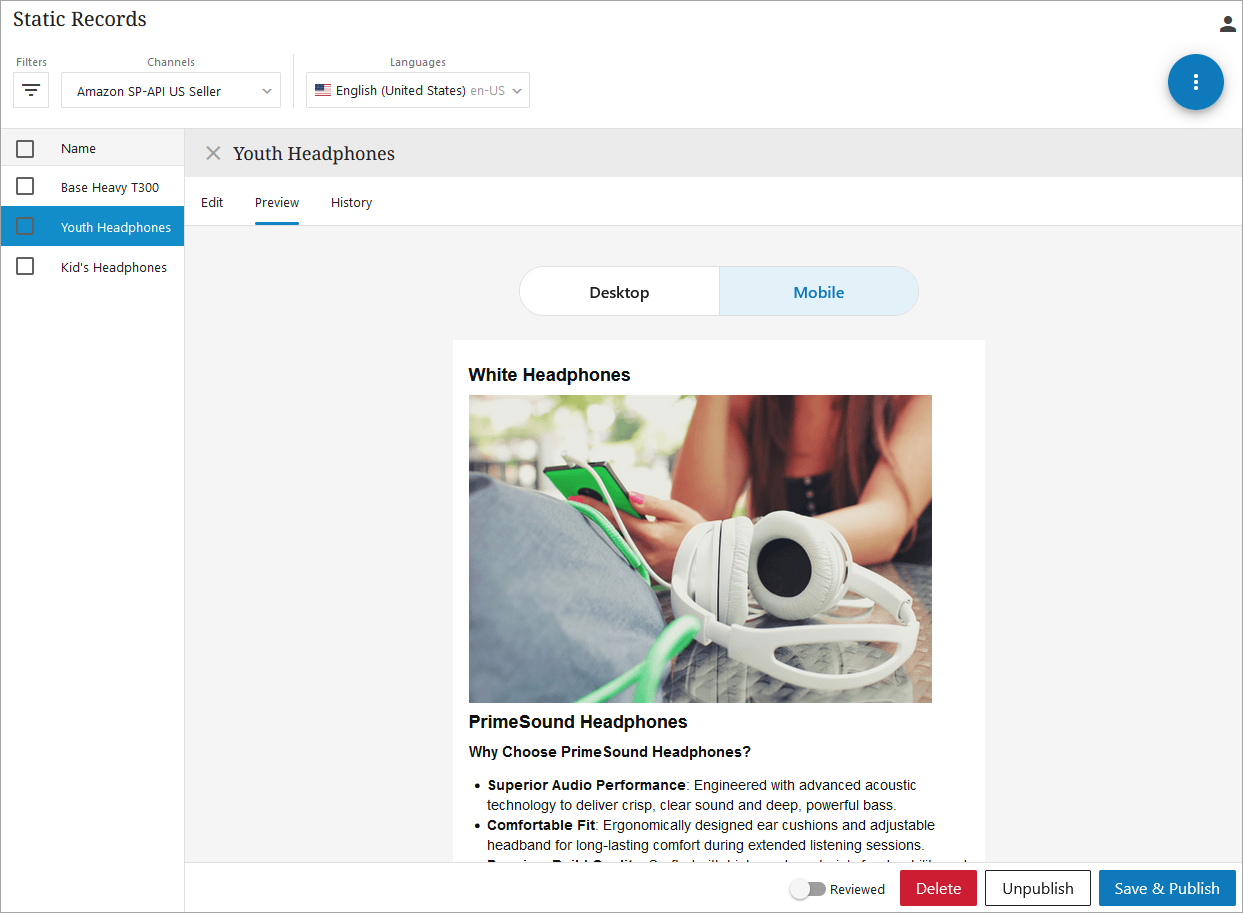
Preview
The Preview tab allows a user to have an approximate view of how the specific enhanced content record looks on a desktop or mobile browser. This can help users make layout decisions and catch errors. It can be previewed as a desktop view or as a mobile view.
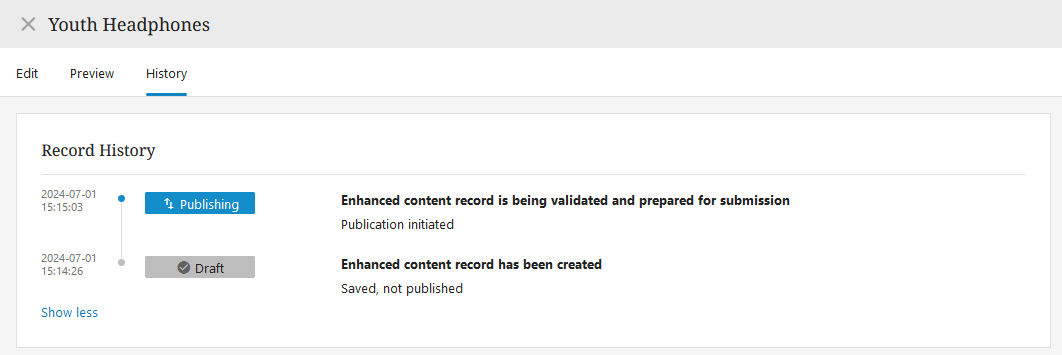
History
The history tab, enables a user to view all that has been done to a record.
Static Record Available Actions
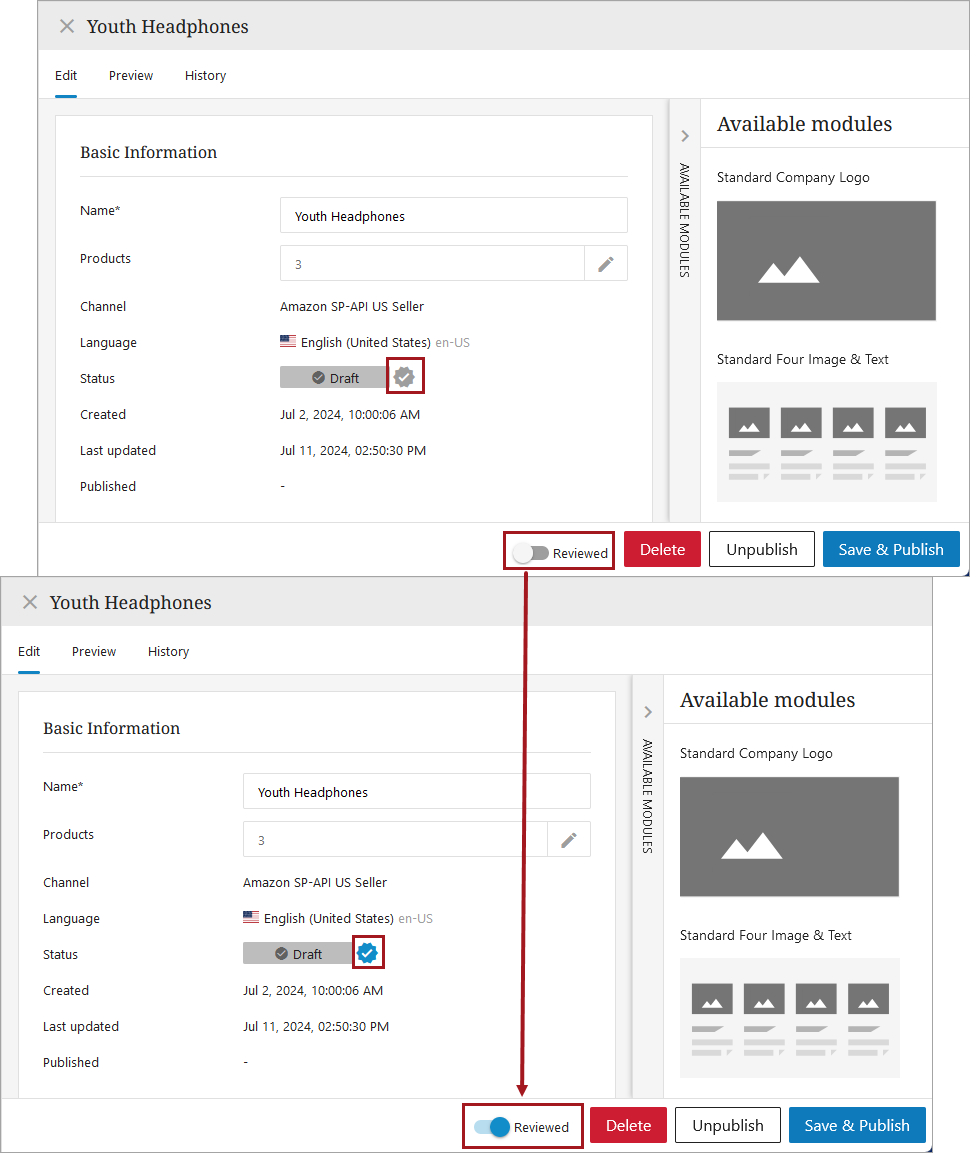
On any tab for Static Records, a user can choose one of the following actions:
-
Reviewed: If the user is satisfied with the record, they can click the Reviewed bar, which turns the reviewed badge in the Status parameter blue, signaling that it is ready for the next step, such as publishing.
-
Save: If more work needs to be done on the record, the user can select Save, which saves the work of the draft, or if the record is already published, saves the work without making changes to the published record.
-
Unpublish: If the work was previously published but is no longer needed, a user can click the Unpublish button.

-
Save and Publish: Select this if the record is ready to be pushed to the Enhanced Content platform. If records already exist, they will be updated.
Note: If there are missing fields and the user tries to publish, an error message will display and the fields that are not filled out or are out of compliance will be highlighted in red.